Create a Discord bot that uses OpenAI to generate responses to messages using Python

This article intends to explain how to create a simple Discord bot that replies as OpenAI’s chat would do. And gives you a walkthrough of containerizing the application.
What do you need?
You need an OpenAI account api-key which you can find in your OpenAI account.
You need a configured Discord bot, here is how to do that.
Make sure your Discord bot has permission to read and send messages, and that it’s added to your discord channel.
First things first let’s use discord’s Client class to create the bot, and install this library with the command:
pip install discord.py
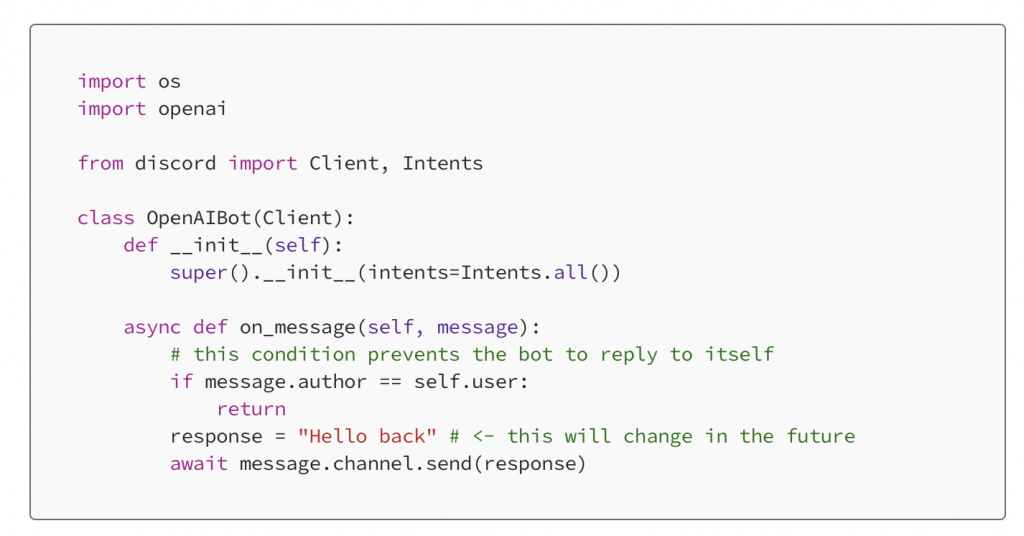
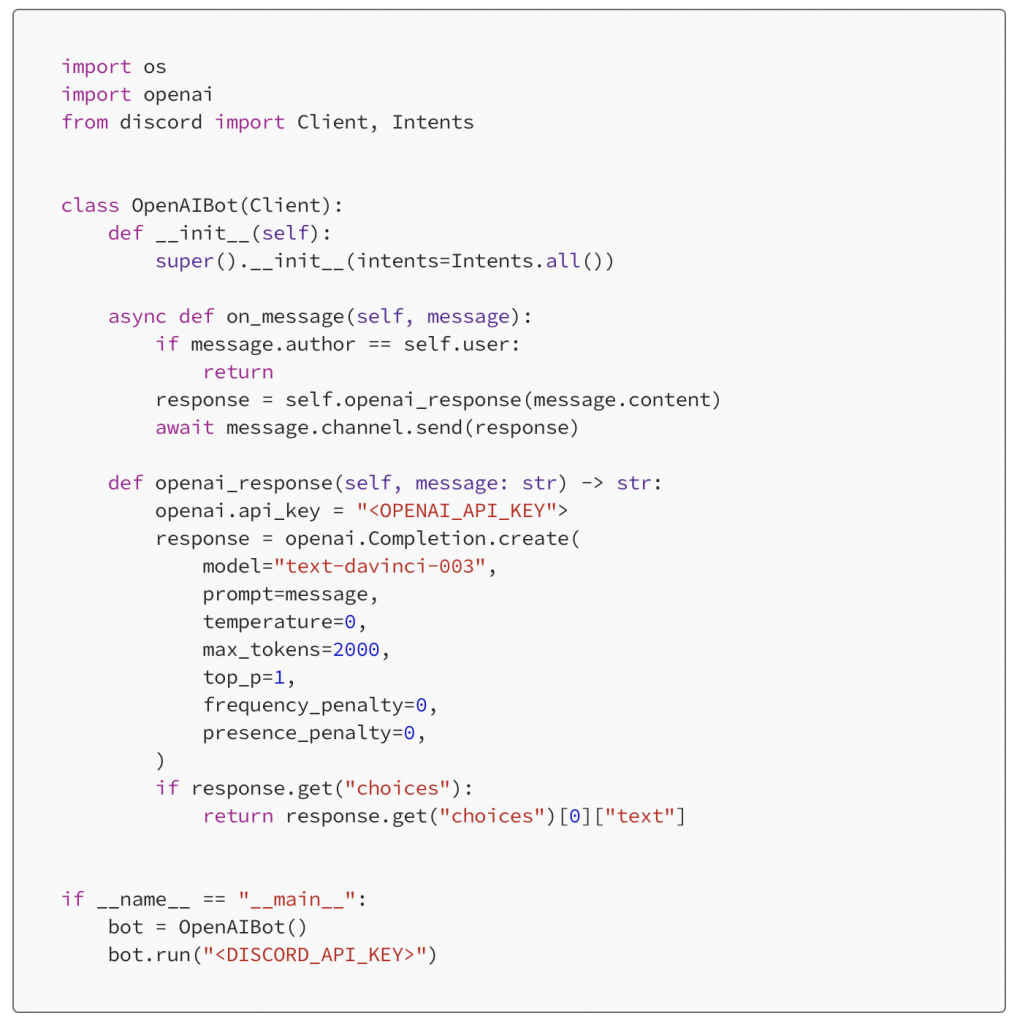
We’ll first create our own class named OpenAIBot which will inherit the Client class and add two more functions to it. This Client class takes intents as a constructor argument on initialization.
You could use the default Intents unless you have a particular one to specify.

Let’s override the asynchronous function on_message, which is triggered when a message is sent to the channel you added to your discord bot.
Now we have to deal with OpenAI’s library for python, first, let’s install it:
pip install --upgrade openai
The only thing we need for OpenAI to be able to respond to our messages is the Completion engine and that is possible with a simple request:
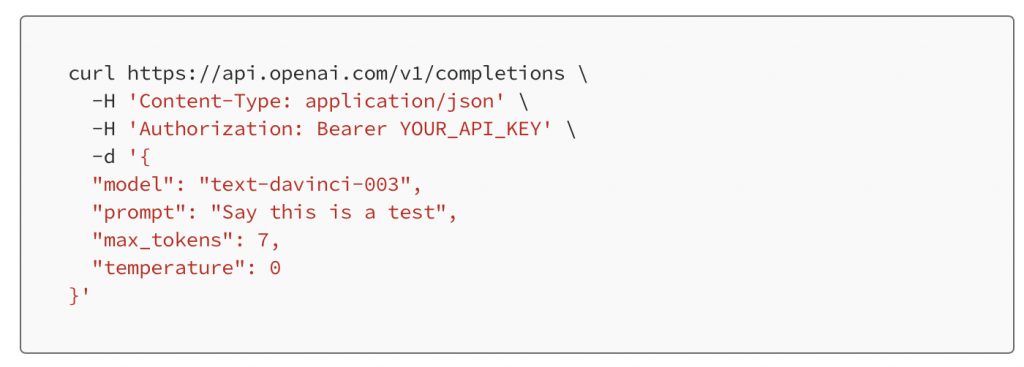
For more information on customizing this call check out the API reference of OpenAI.
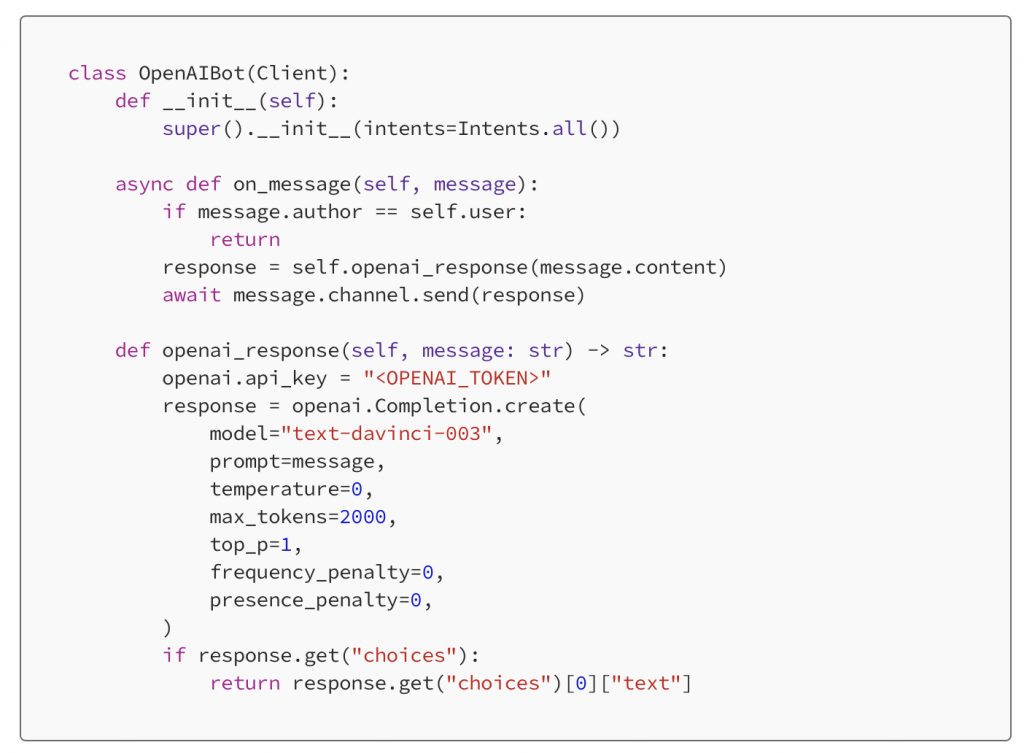
Back to our code, we will now add a function called openai_response which takes a message as an argument and returns a message from OpenAPI.
We will use openai.Completion.create() functions to help us out with the communication:
Great!
Now running the bot would require the initialization of this class and the call of run of the super-class Client.
We’ll use the condition if __name__=="__main": to avoid starting the bot when we (if we) import OpenAIBot in the near future.
Now the code looks like this:
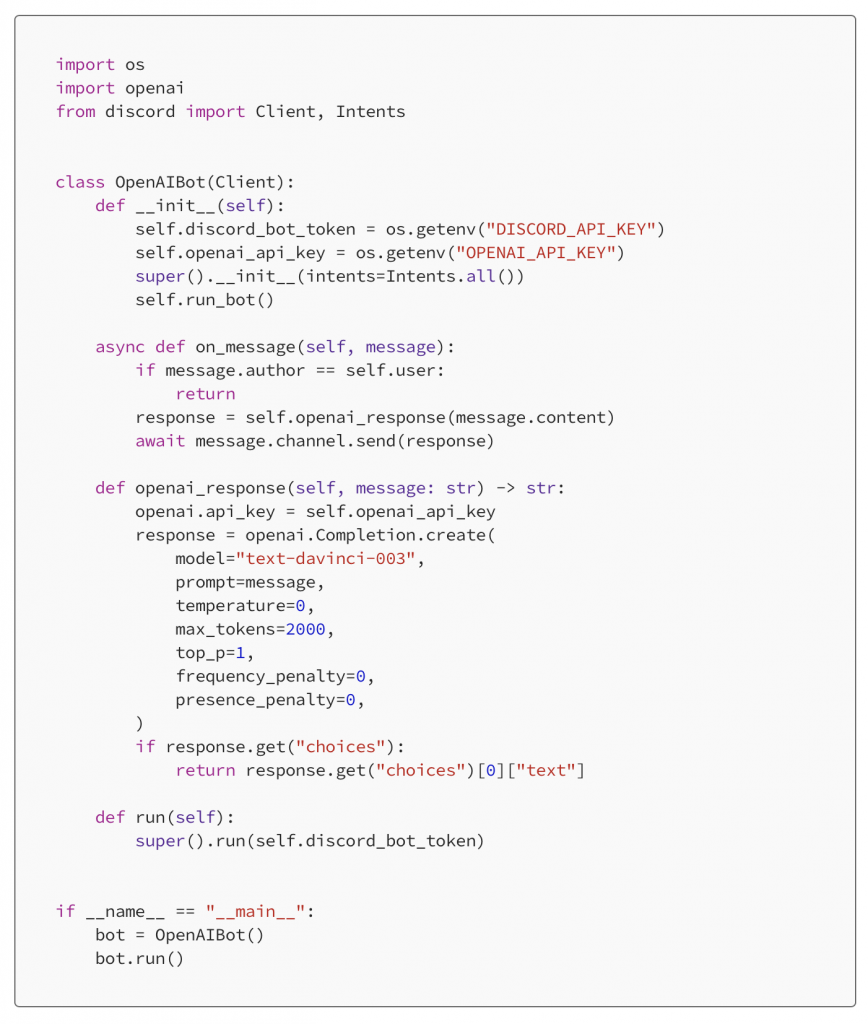
There is a problem here, it’s not good to directly insert confidential data like API keys on your code. We will use os.getenv to load these constants from our system.
After some minor tweaks the code will look like this:
Assuming our main python script is named main.pywe can proceed to execute it:
python3 main.py
Now you will see indications that our discord bot is running if you configured everything correctly.
How about using docker?
I love Docker, so yes…
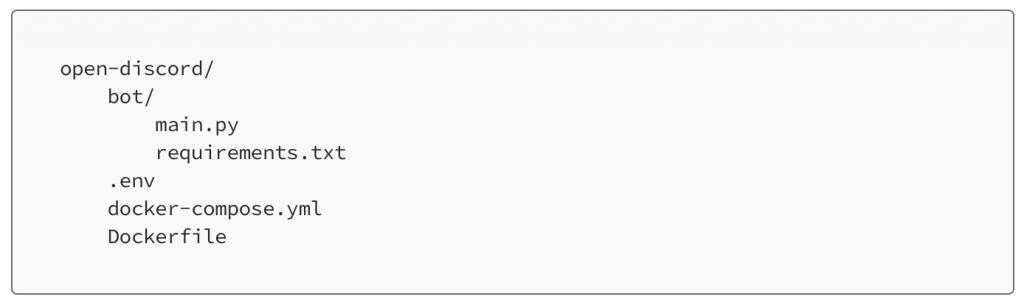
Let’s create Dockerfile and docker-compose.yml for our docker configuration then .env for our environment variables, our project structure now looks like this:
Here we can explain the content and functionality of our new files, .env will hold the Discord and OpenAI tokens.

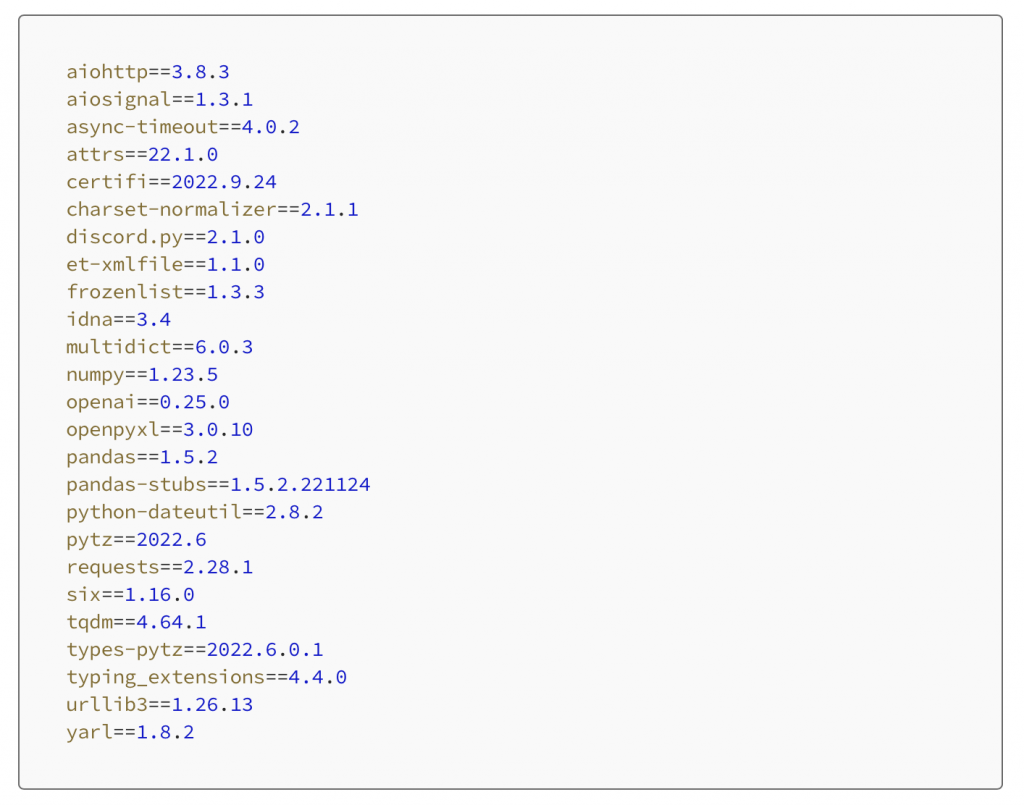
A new file in our project is requirements.txt as well, you can generate by freezing dependencies to this file with the command:
pip freeze -> requirements.txt
Avoiding getting extra dependencies written in requirements here is the file I generated using a virtual environment:
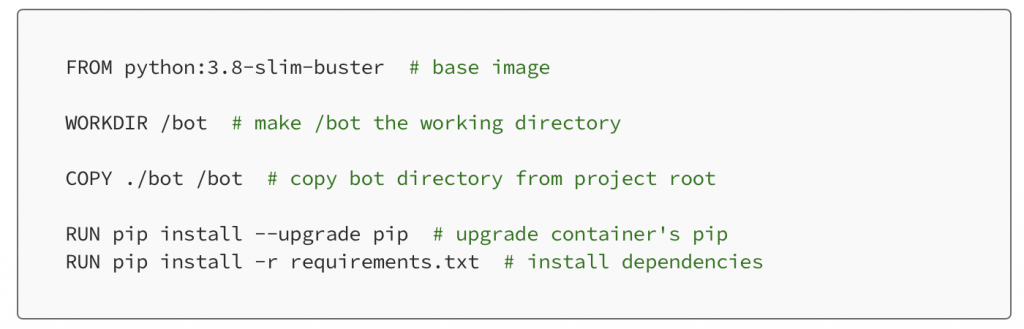
Now let’s explain Dockerfile, first, we’ll use python:3.8-slim-buster as the base image to build our container on, then set /bot as our working directory, copy bot the directory from the project root to the container and install the required dependencies:
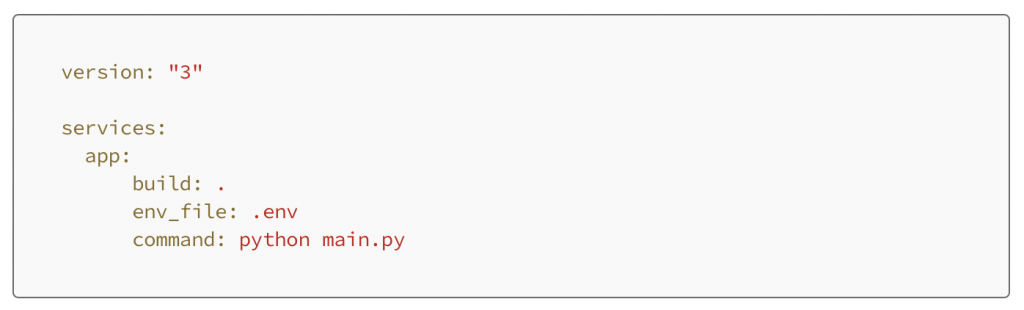
Simple docker-compose.yml configuration with a single container which is built based on the instructions on Dockerfile:
Build the docker image and spin up the container:
docker-compose up --build -d
And now you have the OpenAI discord bot running in a container.