Advanced React Patterns
1. Prop getters
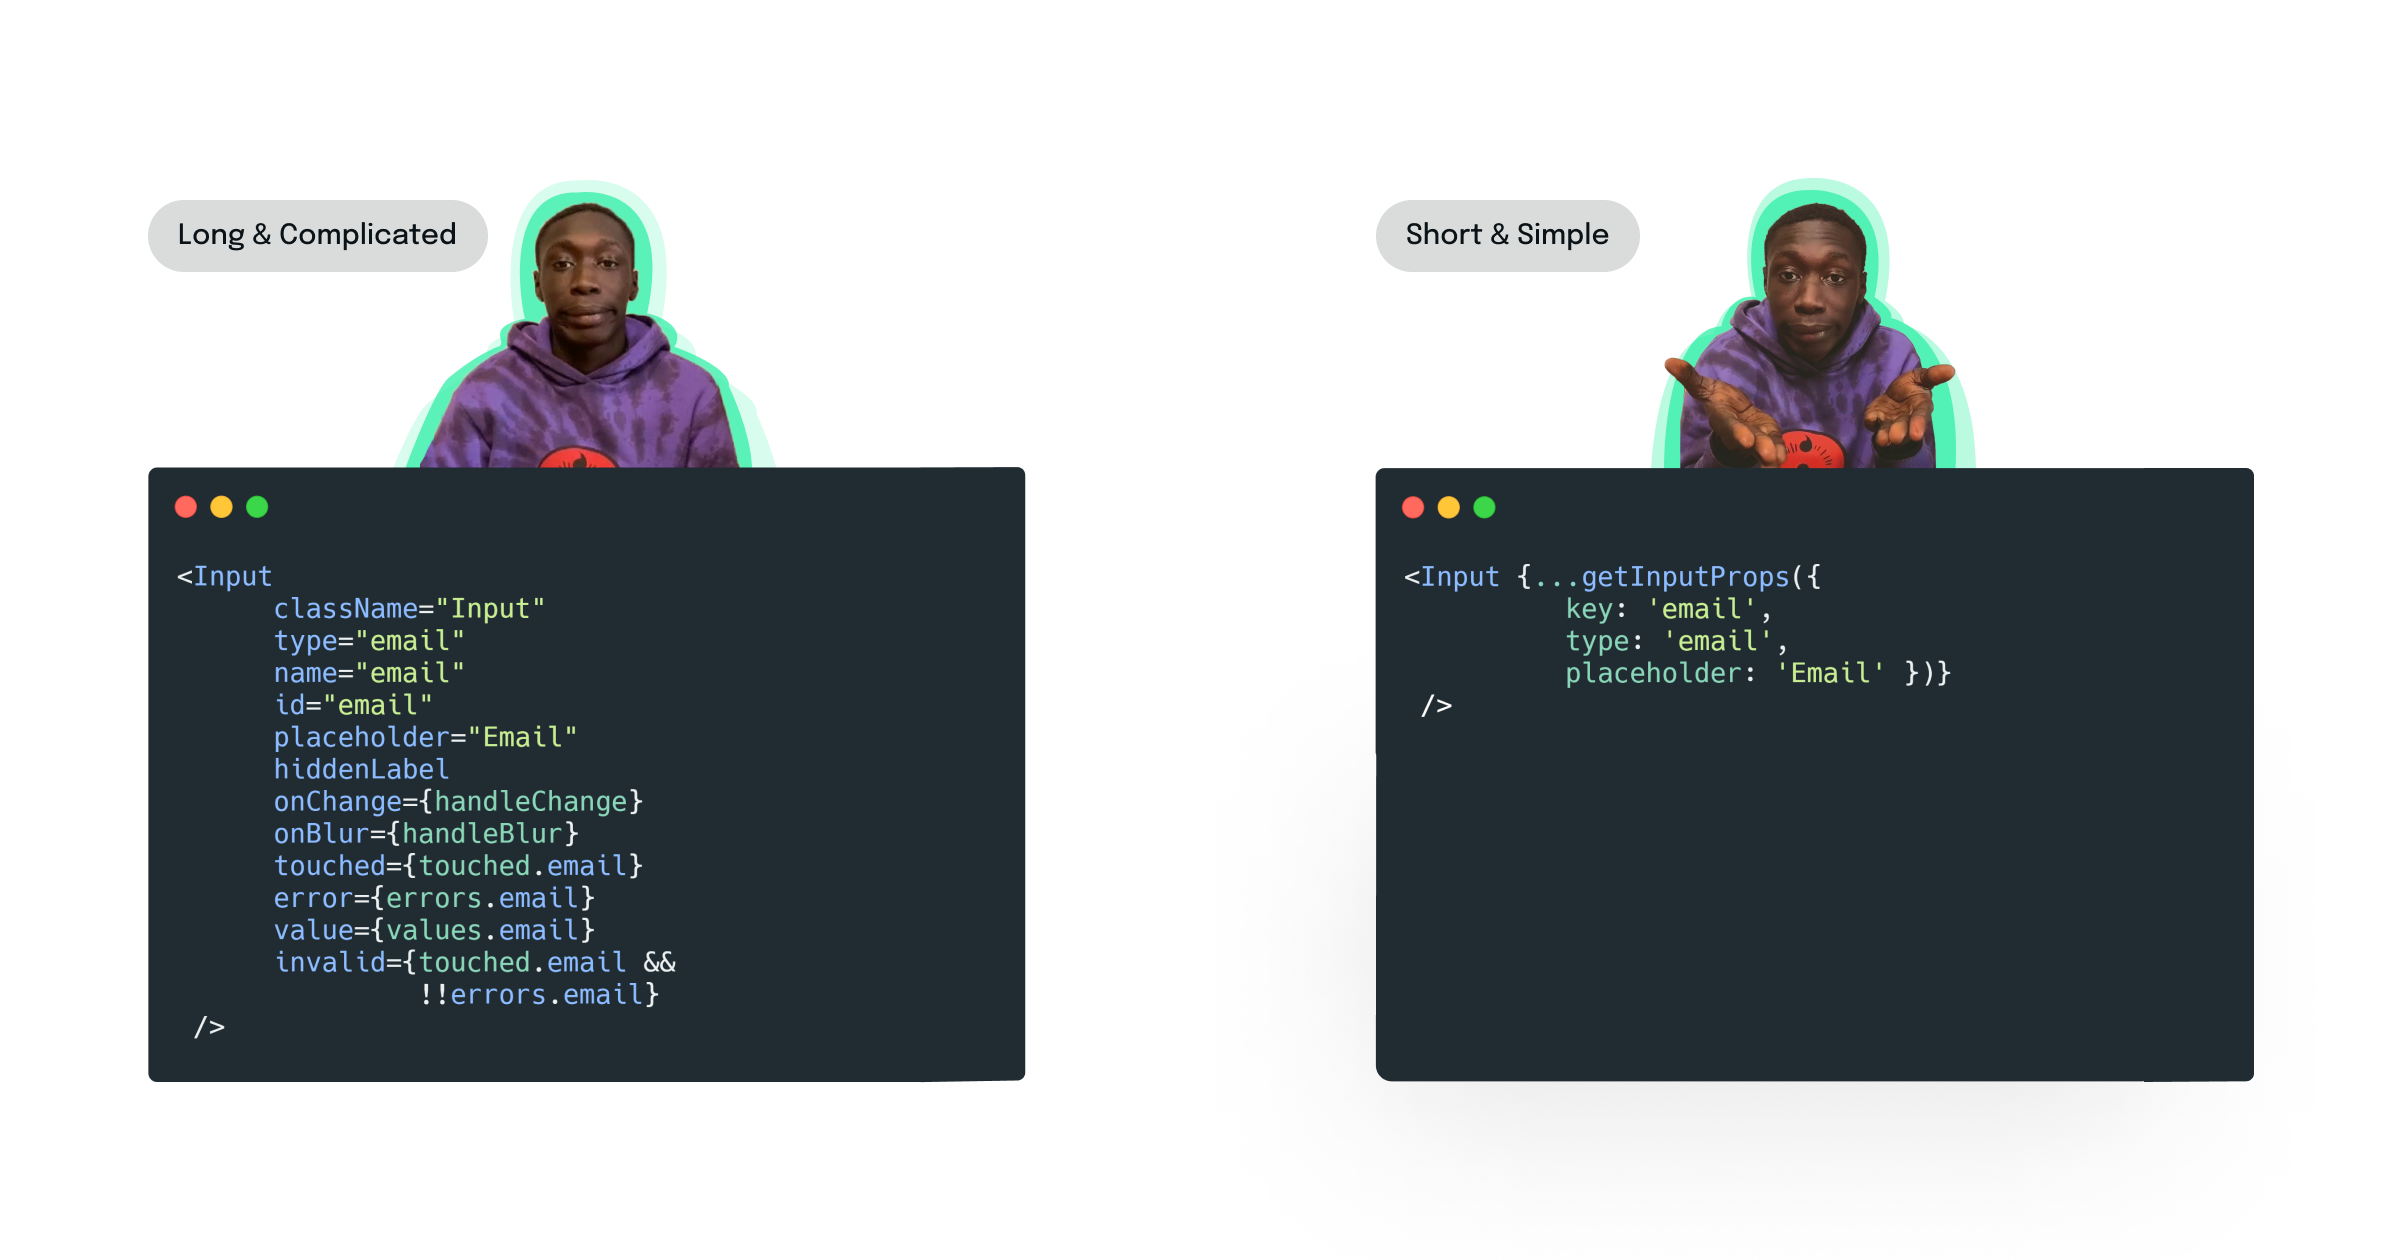
We all know that React is about reusability and sending props is one of the ways that make React components so reusable. Passing props to components is an easy task, as shown in this simple case:
<Input
    className="Input"
    type="email"
    name="email"
    id="email"
    placeholder="Email"
    hiddenLabel
    onChange={handleChange}
    onBlur={handleBlur}
    touched={touched.email}
    error={errors.email}
    value={values.email}
    invalid={touched.email && !!errors.email}
   />
This works great! By sending props to an Input component, we can reuse this Input anywhere. But, what if we had to render more Inputs? Then, we will have to pass these props to each Input. Our component would have too much code and that would hinder the readability of our code. That is why we use prop getters and that makes even the props reusable.
Prop getters are one of the patterns that hand rendering responsibility to the user of your components. To put it simpler, prop getters are functions that will return props when called. Let’s dive into the fun part:
const getInputProps = ({ key, type, placeholder, ...rest }: InputProps) => {
  return {
      className: 'Input',
      type: type,
      name: key,
      id: key,
      placeholder: placeholder,
      onChange: handleChange,
      onBlur: handleBlur,
      touched: touched[key],
      error: errors[key],
      value: values[key],
      invalid: touched[key] && !!errors[key],
      ...rest,
    }
  };
So, the function getInputProps is called prop getter and this is the way we use it:
<Input
{...getInputProps({ key: 'email', type: 'email', placeholder: 'Email' })}
/>

<Input
{...getInputProps({ key: 'password', type: 'password', placeholder: 'Password' })}
 />
This way, we made it possible for our code to look cleaner. More importantly, we don’t need to remember or look up the docs for all the props we need to pass to the component, in order for that component to work. One of the questions everyone asks is: Why aren’t we using objects to pass those props? Because by doing so, we remove the getters from the prop getters. This way, you disable the possibility for the user to override your props, and our prop getter function could not be reused in other components.
2. React compound components
The idea behind compound components is that you have two or more components that can work together and accomplish a task. A compound component can easily be compared with a list <ul> and a list item <li>:
<ul>
  <li>Kutia</li>
  <li>Beetroot Academy</li>
</ul>
Using this two together makes sense but using them separately would not work. This way of building components gives you a nice way to express relationships between components.
Let’s get a look at how we can implement this in React, in order to understand these principles even further. What we will build is a simple Tabs component that will show description based on the Tab, when clicked:

There are various ways of building this but sometimes, when we (programmers), are on a tight deadline, we tend to make things fast. I personally believe that one of the fastest ways to do this would be like this:
<Tabs
   options={[
      {
        id: "kutia",
        name: "Kutia",
        description:
          "The story of Kutia began in 2013, in Pristina, Kosovo. Over ...",
       },
       {
         id: "beetroot",
         name: "Beetroot",
         description:
           "Beetroot Academy Kosovo in cooperation with Kutia have ...",
        },
    ]}
    onClick={handleClick}
    className="Tabs"
  />
At the first sight, it looks good and it does its job. But then, our client would like to switch places of the Tabs and add another button to add a new Tab, and that would leave us sending other props, right? Suddenly, we have a component that has an extensive and expanding list of possible props as potential use cases stack up. This means we would have a hard time making this component general, and we could miss on deadline and have a component that is not extensible. This reminds me of a famous old Albanian quote: ”Rruga e shkurtë del ma e gatë”, or as I intend to translate it to English: “Short ways lead to longways“.
Following the same pattern as the simple HTML selection mentioned above, we need to think about having a contextual wrapper around the child components, so that we can also pass implicit state between the parent and child. Our Tabs component would like like this:
<Tabs>
   <Tab id="kutia">Kutia</Tab>
   <Tab id="beetroot">Beetroot Academy</Tab>

   <TabPanel id="kutia">
      The story of Kutia began in 2013, in Pristina, Kosovo. Over...
   </TabPanel>
   <TabPanel id="beetroot">
      Beetroot Academy Kosovo in cooperation with Kutia have implemented...
   </TabPanel>
</Tabs>
This way of implementing components is much extensible since you can switch places of different Tabs, easily add new buttons to add new Tabs, etc. Also, our code looks much cleaner! Now let’s see how can we implement it!
import React, { useContext } from "react";

export const tabContext = React.createContext({
  activeId: "",
  handleClick: (id: string) => {},
});

export const useTabContext = () => useContext(tabContext);
This is our TabContext.ts file. To make it work, we create a context with React where we store the state and a mechanism for updating the state.
import { tabContext } from "./TabContext";

const { Provider } = tabContext;

interface Props {
  children: React.ReactNode[];
}

export const Tabs = ({ children }: Props) => {
  const [activeId, setActiveId] = useState("kutia");

  const handleClick = (id: string) => {
    setActiveId(id);
  };

  return <Provider value={{ activeId, handleClick }}>{children}</Provider>;
};
Then the <Tabs> component is responsible for providing that context value to the rest of the react tree.
export const TabPanel = ({ children, id }: Props) => {
  const { activeId } = useTabContext();

  return <div className="TabPanel">{activeId === id && children}</div>;
};

export const Tab = ({ children, id }: Props) => {
  const { handleClick } = useTabContext();

  const selectTab = () => {
    handleClick(id);
  }

  return (
    <button className="Tab" onClick={selectTab}>
      {children}
    </button>
  );
};
Now that we’ve implemented our contextual wrapper, the <Tabs>. We need to implement the individual <Tab> and <TabPanel> items so that they are able to subscribe correctly.
To sum it up:
The <Tabs> component uses React Context to store the current state, the state update function, default active Id, and whether the <Tab> should have a color contrast between odd and even child components.
I love to share my experiences with other enthusiastic developers and I will be writing more blogs like this in the future! I hope you found it useful and I hope you had a good time reading it! 🙂